After a long hiatus to heal, I’m gradually getting back to work on projects in the shop. Since I love learning something new, I’ve decided to try my hand at willow weaving. Now I know that some of you will not see this as woodworking per se, but willows are trees and their harvest and seasoning is as important to their use as with timber.
Willow weaving is much more involved and difficult to learn than reed or splint weaving. You might remember my foray into weaving pack baskets during the pandemic. Those were a piece of cake compared to working with willow. So why willow? Well, there is the aesthetic of working with round willow wands. The baskets and other projects have a natural and rustic beauty to them. Willow has been used since pre historic time. The other reason is durability. Reed and splint projects wear out with regular use, start to break down and come apart. Willow projects can last for generations.
So, I bought some willow wands at a local willow weaving event, along with a couple of basic instruction books. Tools are also needed for willow weaving and this is where I got sidetracked. The quality of tools offered at the event was not really what I was expecting, and my first thought was, “I can do better than that myself”, and so of course, I had to set out to do just that.
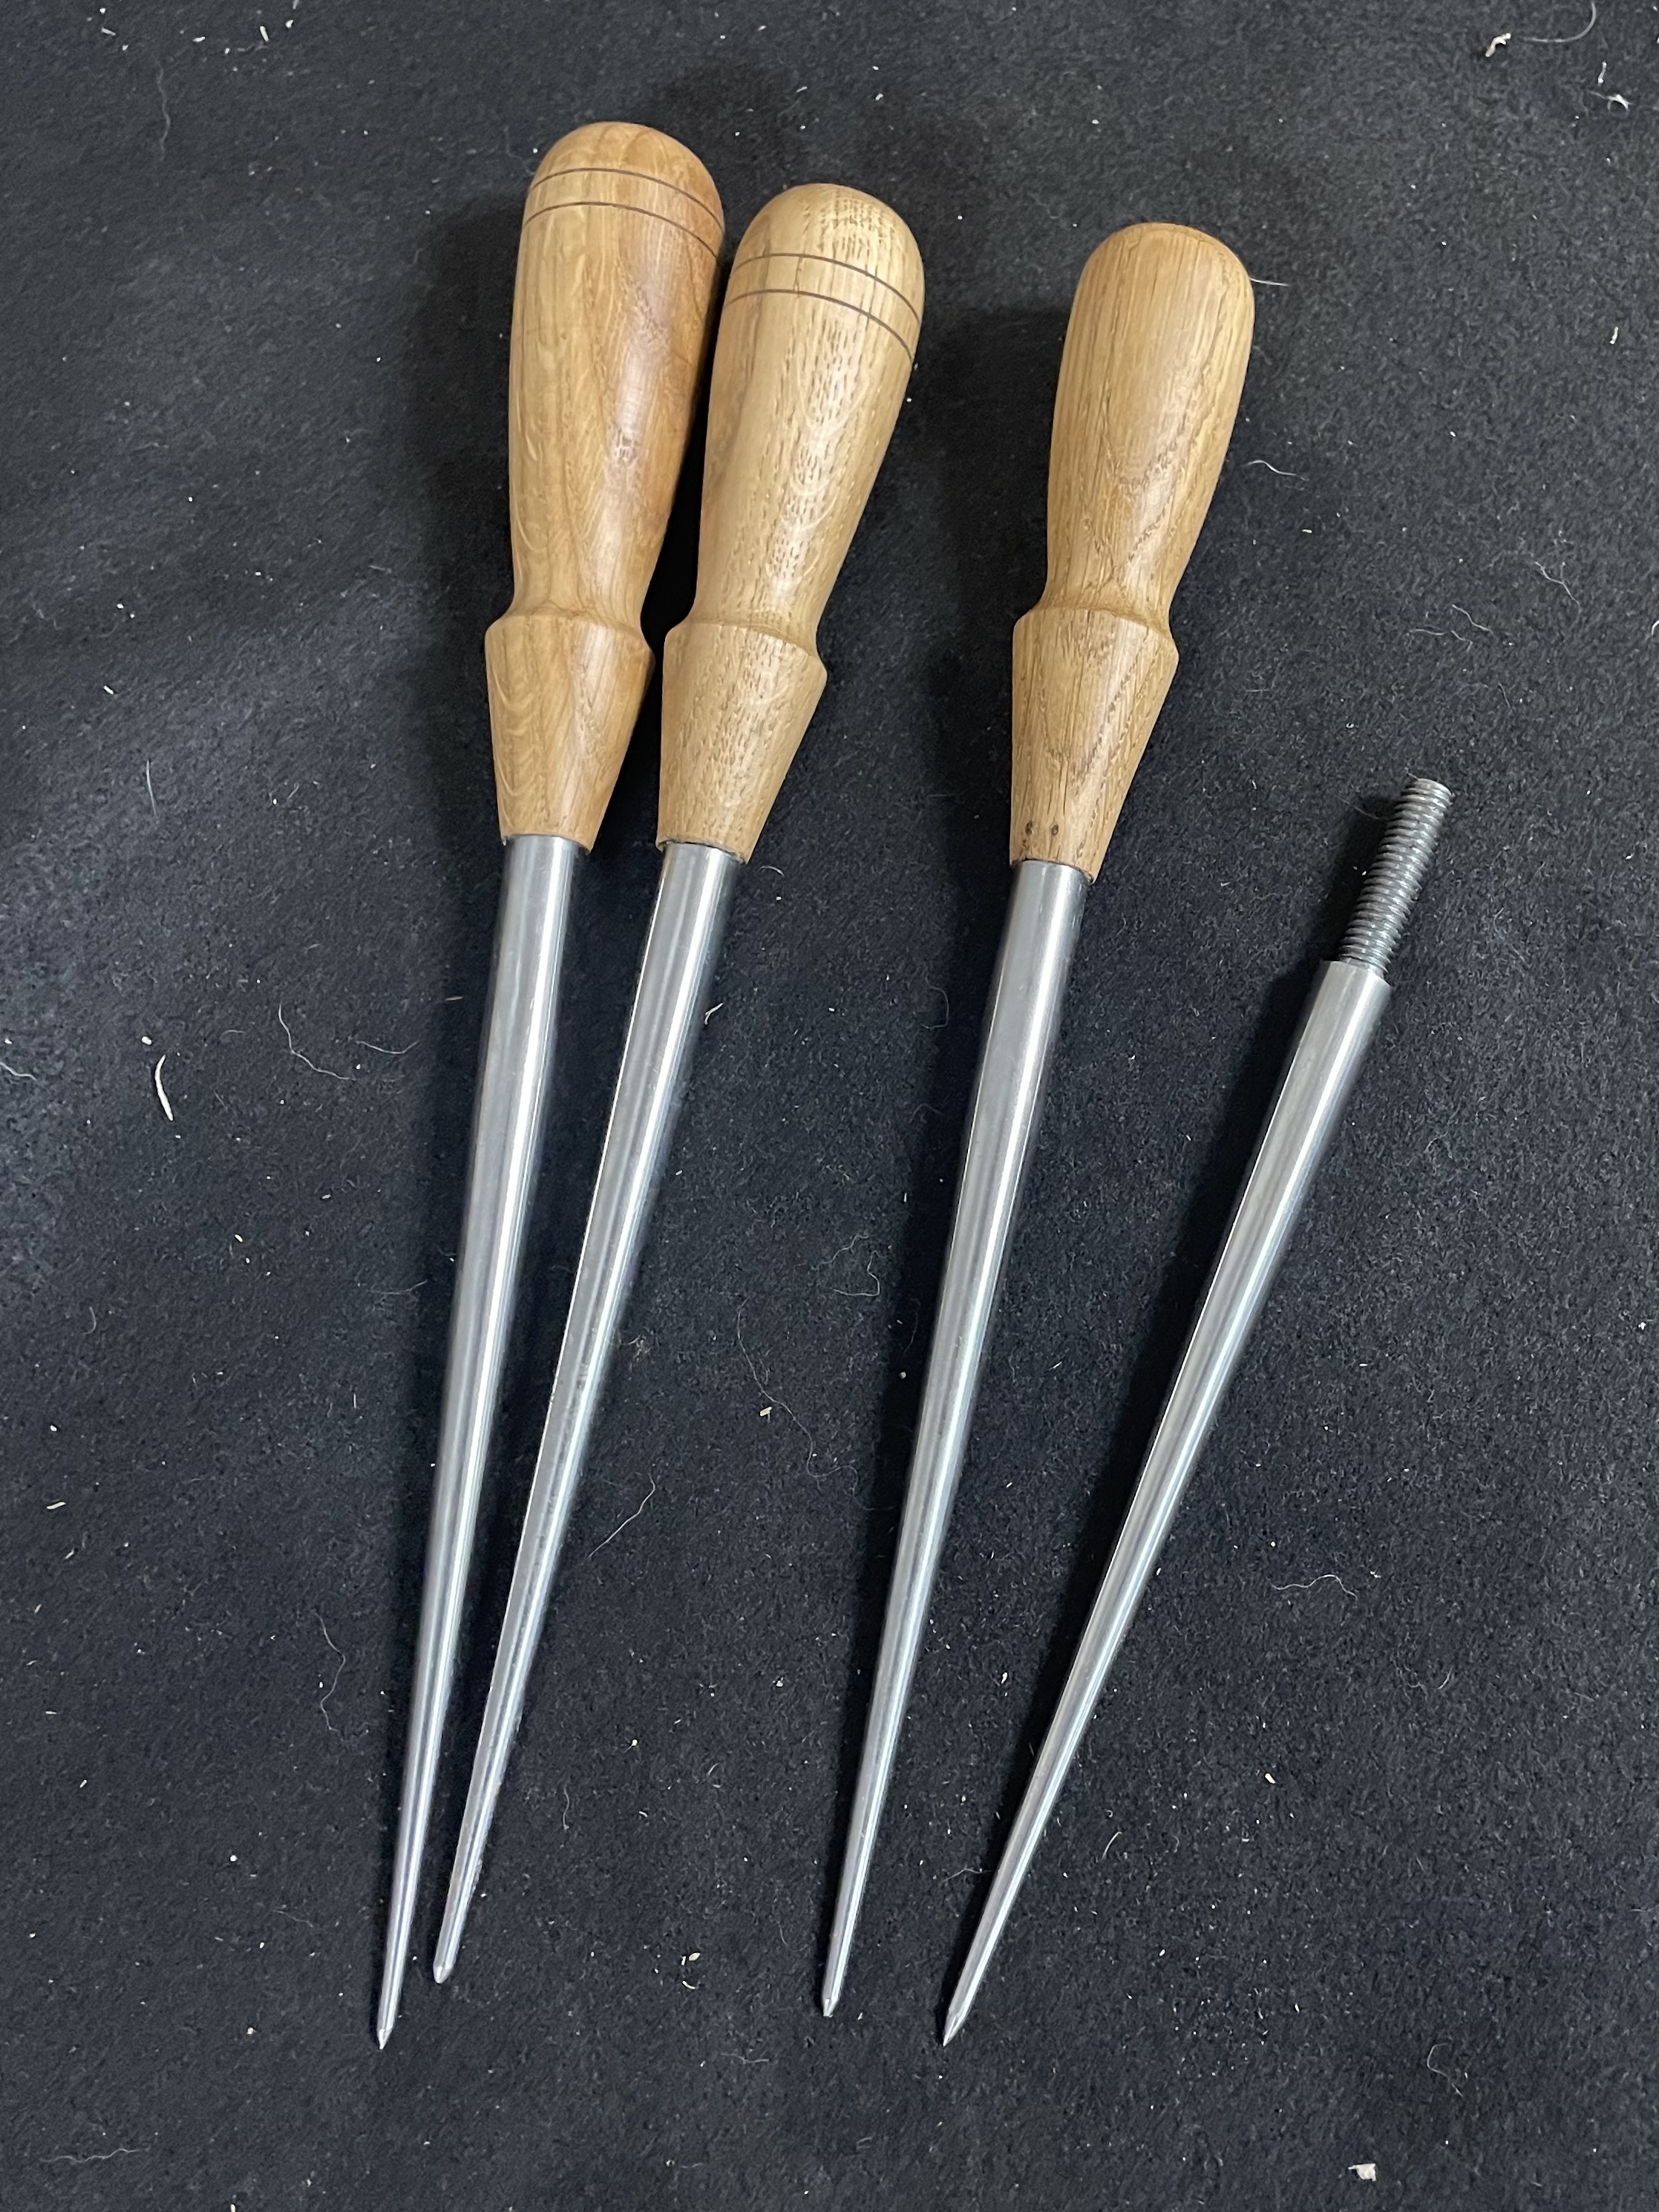
The first basic tool needed was a pair of weaver’s bodkins. The bodkin is a slender rod, with a long taper to a point. You could easily modify a large screwdriver to do the job, but I wanted something more purposeful and a bit more elegant.
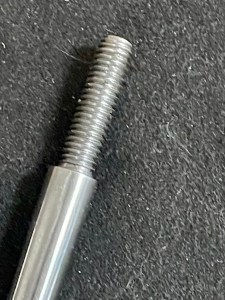
404 stainless steel is supposed to be very machinable and durable so I ordered some 1/2″ round bar from an online source and went to work on the machine lathe. I wanted the handles of the bodkins to be removable so that they could be customized for the user, and because I was unsure as to what kind of handle I would prefer, I wanted to be able to change them. After cutting the rod to length I reduced one end to 3/8″ and threaded it to 16 tpi. I then bored and threaded a piece of 1/2″ navy brass rod to chuck into the lathe and act as a holder for the stainless steel workpiece. After tapering the rod to its final shape, I sanded and polished it.
I find working with metal to be something of a necessary evil, and although I do derive some satisfaction from creating something in metal, I don’t really enjoy the process so much, or the clean up. But having made the bodkins ready for handles I was now ready to start woodworking again.
In use, the bodkin is pushed into the weave of a basket to provide an opening into which the end of a willow rod can be inserted. The bodkin is usually lubricated, traditionally with tallow. To push the bodkin in requires a comfortable grip broad enough to distribute the pressure against the palm. You also need to be able to grip the handle well enough to remove the bodkin.
After researching a number of handle styles online, I decided upon one that resembles a comfortable chisel handle that I liked. The handle divides the pushing pressure between the palm and the thumb and forefinger. This also provides more control for precise placement of the bodkin’s point. The steep tapers on the handle allow a good grip for removal of the bodkin and the threaded joint ensures that the bodkin comes out in one piece.
All in all I’m pretty satisfied with the tools I made, although I think that I may replace the prototype handle on the first one with the final shape that better fits my hand. Or maybe I’ll leave it, to see if it fits someone else’s hand better. Next, on to weaving.